by John Glynn | Feb 22, 2017 | Classic Porsche Blog, Project Cars
One of my favourite Porsche projects of the last few years has been working with my friend Jonny Hart on the brand development of his company, Classic Retrofit. Jonny and I became online friends soon after he joined our 1974-1989 Porsche 911 forum at impactbumpers.com and it has been fun to follow his electronics magic on parts for these classic 911s, including the all new Porsche 911 air con system.
The peak of achievement to date is Jonny’s electric air con kit for classic Porsche 911s. Branded ‘Electrocooler’, the full kit is about to be unleashed on the classic Porsche community in its first public showing at the LA Lit Show on March 4.
I shared some pics on Classic Retrofit’s social media pages last week and they went totally ballistic: a most rewarding return for all of Jonny’s hard work. I have just sent more details out and am sure that many of my Ferdinand friends will also be interested in knowing more, so I share them below.
Email Jonny at info@classicretrofit.com to discuss any of his products.
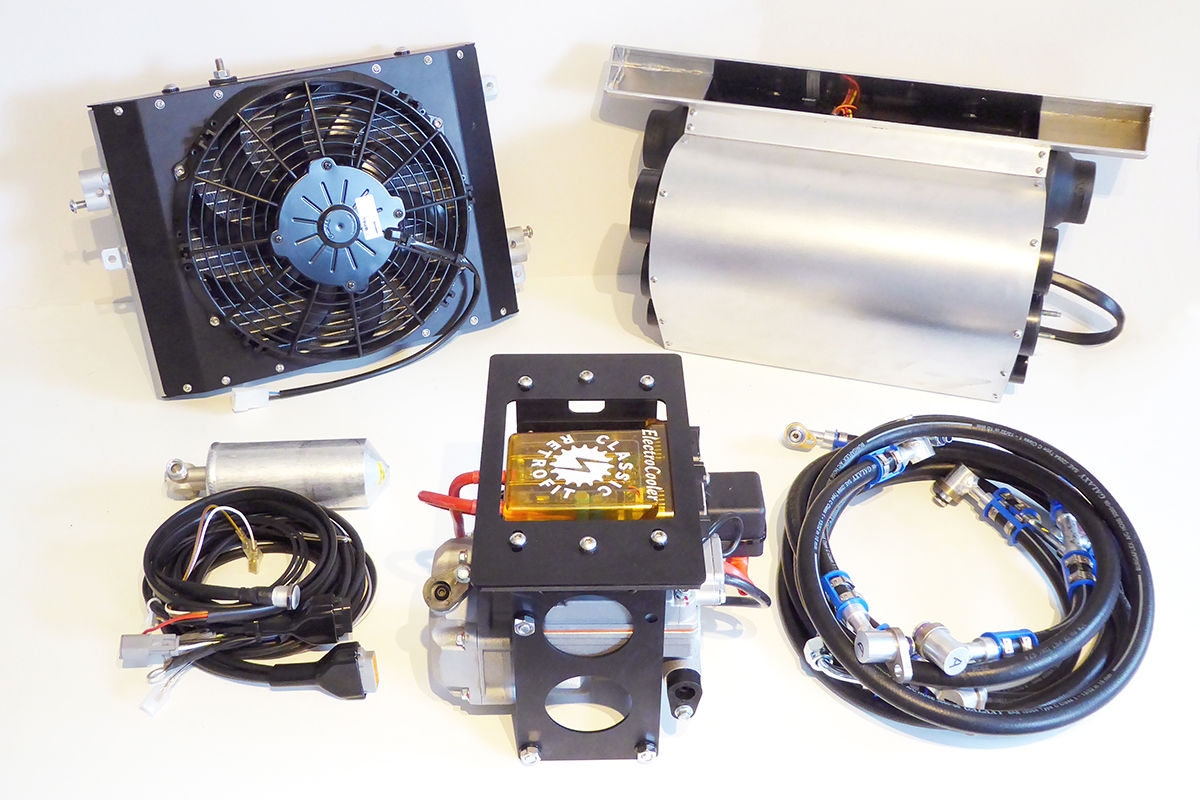
Classic Porsche 911 Electric Air Con: A/C Technical Layout
The compressor module (front centre in the picture) goes in the smuggler’s box on a LHD 911. On a RHD car, the compressor is mounted adjacent to the battery and fits with no modifications to battery or spare wheel arrangements.
The condenser goes under the front wing/fender, in place of the oversized windscreen washer reservoir on an impact-bumper car. The blower unit (top right) contains a modern fan and evaporator. All original non A/C vents now blow A/C air.
The occupants can also enjoy A/C air out of any vent in the car, including warm A/C air for rapid windscreen defogging. Our blower assembly brings recirculation capability to the 911s ventilation system and assists heated air flow for hot air without the need for footwell blowers.
Maintaining the standards of classic Porsche design, the original cabin slider ventilation controls are retained, for maximum discretion. A single pushbutton with indication is the only visible clue that Electrocooler is fitted.
Electrocooler Weight Savings and Performance Benefits
As shown in our photo, the complete kit weighs a shade over 16 kilograms (35 lbs). Combining the fitment of a smaller washer bottle and accounting for removal of the original fresh air blower, installing Classic Retrofit’s Electrocooler kit to a 911 originally supplied without factory air conditioning adds less than 7 kilograms (15 lbs) to overall weight.
For a car originally equipped with factory air conditioning, converting to the Classic Retrofit Electrocooler system results in an overall weight saving of circa 18 kilograms (40 lbs).
There is the added handling benefit of weight loss at the rear of the car by removing the substantial original air-con compressor from its elevated position in the engine bay, not to mention the increased fuel efficiency and engine power, once the crankshaft load inflicted by the archaic belt-driven compressor is removed.
by John Glynn | Feb 20, 2017 | Classic Porsche Blog, Project Cars
The Canary Islands are volcanic isles located off the north-west coast of Africa, just a half-hour flight from the Western Sahara Desert. I first visited the Canaries in 1993 and instantly fell in love with the islands and the people. I have since returned here many times, visiting each of the islands over the years, but Gran Canaria remains my favourite.
The locals say that Gran Canaria is like a mini-continent. Divided by a mountainous centre, the south gets most sunshine, so is where the resorts are. In the north is Las Palmas, Spain’s ninth biggest city and the islands’ governmental centre. 850,000 people live on this island, including many extranjeros (immigrants) from across Europe, Africa and Latin America. This Irish immigrant has spent the last seven days here and as always, it has been a pleasure.

Thanks to beautiful weather all year around, a huge working sea port and a very busy airport, Gran Canaria welcomes hundreds of thousands of visitors each year. The mix of global influences has earned GC a reputation for tolerance and an openness to many cultures. This has certainly been my experience. I have made some good friends in Gran Canaria and am interested in possibly owning a house here, hence my frequent visits in recent months. We will see how that goes.
A Lesson in Spanish Philosophy
Canarian history goes back thousands of years and each island is truly unique in character, but today the Canaries are a part of modern Spain. Here we speak español (small e) and follow the rhythms of Spanish life and culture. There is little point in rushing anywhere, as you will only catch up to the bloke in front. Make time for life and life will make time for you is how things tend to go.

Catching up to slower moving people reminds me of the famous Spanish philosopher, José Ortega y Gasset, who believed that a person was the combination of both life and circumstance. “Yo soy yo y mi circunstancia” as he put it. To Ortega y Gasset, circunstancia meant those things forced upon us. He saw life as a constant tug-of-war between the freedom we were born with and our dictated fate.
In the fight between freedom and fate, Ortega y Gasset’s concept is the start of all art. We accept that fate will befall us but inside that acceptance, we select a destiny. Some become part of what the philosopher’s 1929 essays call “The Mass”, while some select a different path.
“The mass crushes beneath it everything that is different, everything that is excellent, individual, qualified and select. Anybody who is not like everybody, who does not think like everybody, runs the risk of being eliminated.”

To escape this fate, Ortega Y Gasset believed that a person must make an active decision to live a life of effort. “For me, then, nobility is synonymous with a life of effort, ever set on excelling oneself, in passing beyond what one is to what one sets up as a duty and an obligation. In this way, the noble life stands opposed to the common or inert life, which reclines statically upon itself, condemned to perpetual immobility, unless an external force compels it to come out of itself.”
The concepts of Ortega y Gasset and others were at the heart of a lively bilingual conversation I enjoyed with my friends Rafael and Jorge over coffee last night. Rafael – a Doctor of Philosophy – is a former consultant to the Swedish government and has just completed another PhD, pondering the practical applications of preventative psychology. His lifelong friend, Jorge, is a Porsche restorer. Both are living “a noble life” that Ortega y Gasset would be proud of.

Pons Vintage Cars
Based just outside Santa Brigida, here in Gran Canaria, Jorge Pons takes the idea of Porsche restoration to the nth degree. While most of the Porsche restorers I have met and worked with add their own touches, that is not the way of Jorge. Pons Vintage Cars believes that, if it is not in the manual, it is not on the car.
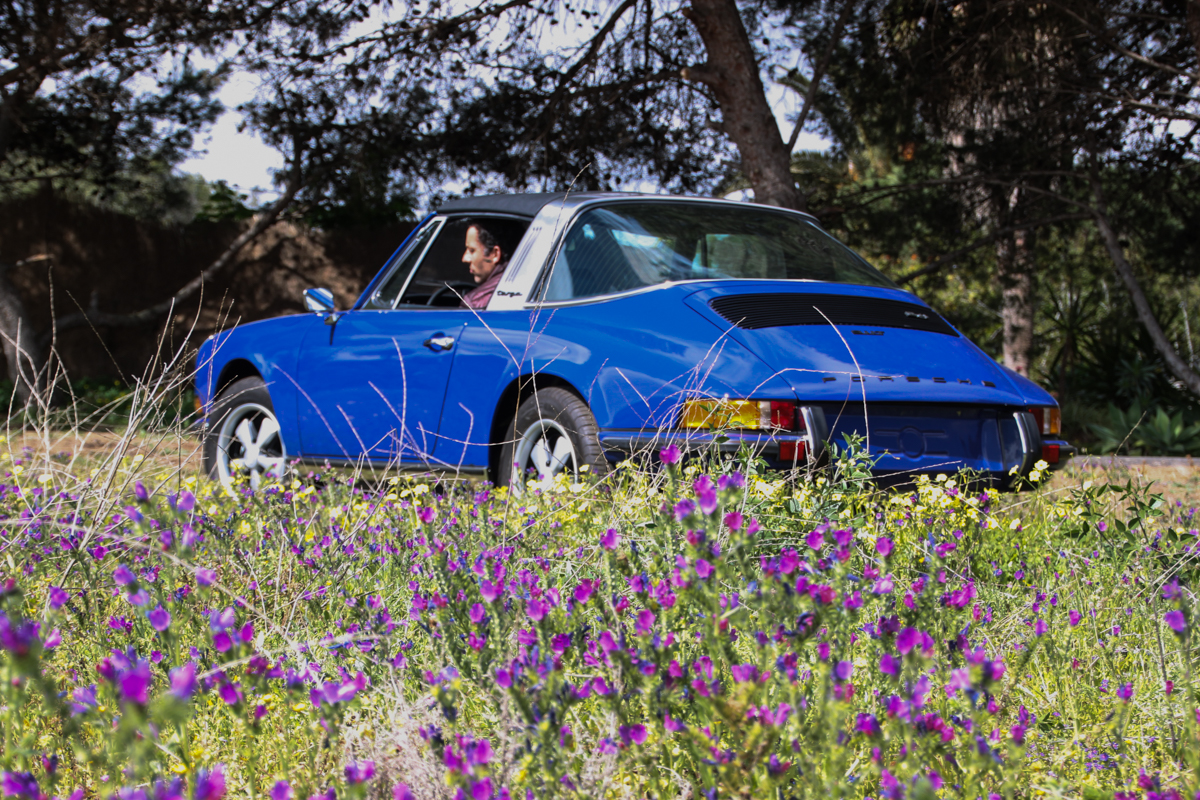
The Dalmatian Blue (Oxford Blue) 1973 Porsche 911 2.4T Targa seen here is a perfect example. And I mean it is a perfect example. Restored over ten months from start to finish, this superb 2.4 T Targa is immaculate inside and out. I had the pleasure of a short drive in this 911 around Jorge’s family estate and it was a delightful experience.

All of Jorge’s 911s are completed to an exacting standard. The ’73 Targa is the seventh car in as many years to come from his wonderfully pastoral workshop. Set amongst the mountains overlooking the wild blue Atlantic and surrounded by palm trees, a group of four much-loved donkeys (burros in Spain) follow progress in the glass-walled garage through wise and appreciative eyes. As a donkey- and a Porsche-lover, I think it is perfect.
Dalmatian Blue Porsche 911 T Targa
Dalmatian Blue is one of my favourite Porsche colours but it is not very common. I have only seen one other 911 in Dalmatian Blue and that was a hot rod built by my friend Gib Bosworth, eventually finished by another good friend. How many Dalmatian/Oxford Blue Targas were ever built in the final year of early 911 production (and how many matching-number examples remain) is anyone’s guess, but it can’t be that many. This could easily be the the best one available.

Anyone seeking a well restored example of classic Porsche engineering should contact Jorge Pons to discuss this car for sale. Gran Canaria is just a plane ride away and shipping is easy. Pons does not ask a fortune for his work – the projects are not about the money – but the prices are not negotiable. This one is up for €125,000, which seems reasonable, given that some dealers in Germany are asking more than €150k for similar cars that will not have taken ten painstaking months to restore. I m back in Essen in april and I have no doubt that cars this good will be into the €160k+ bracket.
Now finished the 911T Targa, Jorge has switched to a superb Irish Green 1970 Porsche 911 T Coupe. This car recently returned from the paint shop following an incredible bare-metal restoration, all recorded on camera. It is beautiful: the paintwork is a joy to behold. I leave Gran Canaria tomorrow, but am very excited to see what progress will have been made when I return to the island in May.
by John Glynn | Jul 16, 2016 | Porsche Cayenne, Project Cars
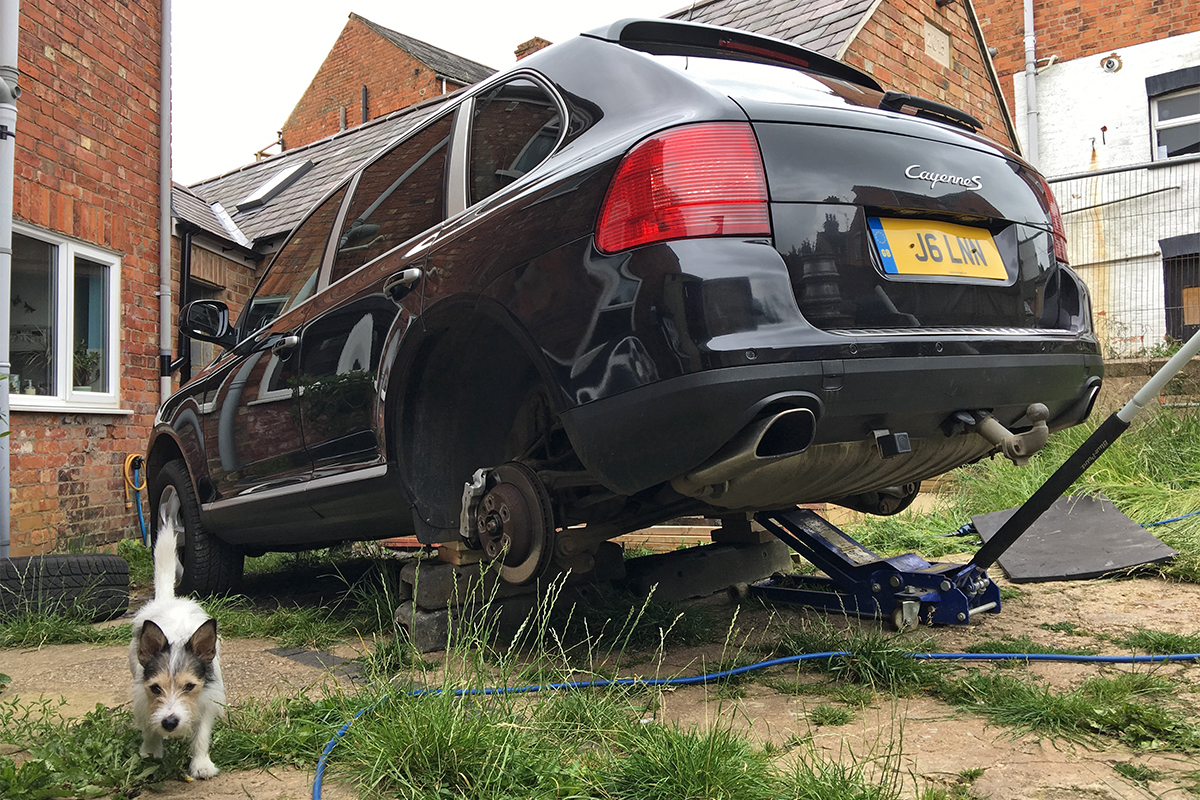
Shakespeare once wrote that “the course of true love never did run smooth”. The timeless wisdom of this observation was proven yet again today, when I tackled a Porsche Cayenne rear spring replacement on my 2004 V8 Cayenne S: a.k.a. The Big Pig.
I took the Cayenne for MOT (annual safety inspection) last week and it was en route to passing with flying colours, until we got to the back end, where one spring had a cracked coil. Instant fail. I priced up genuine Porsche springs at £200 each plus the VAT, or Kilen springs made in Sweden from an eBay seller (the worryingly named “Octane Motorstore”) at £65 delivered for a pair. I wanted to change the pair of rear springs, so £400 versus £65 was a no brainer.

The Cayenne has now clocked up 159,000 miles, with 42k of those in my ownership. Despite all the grief that this high maintenance German car has caused compared to my six previous trouble-free Subaru Legacy station wagons, I’m still quite keen on it, so I do like to keep it working properly and do as much of the work as I can myself.
Rear spring repacement is a pretty easy job on these: the hardest part is finding the time and a dry day to do the work, and jacking the Cayenne up to get underneath it. Working on this thing on the ground is a pain in the arse as it is so heavy. I go with a belt and braces approach to supporting the car as I am always working on my own. You are not coming out in one normal-size piece if it slips off a jackstand while you’re underneath it, so I use substantial (heavy) underpinnings.

Eventually I got it up in the air, well supported with the rear wheels off and sized up the job. The rear suspension looks complicated, but it’s pretty simple: Pelican Parts has a great how-to on removing the rear suspension. The spring and damper assembly is a complete strut just like the front, so, once the anti-roll bar droplink is out of the way and the bottom shock nut is off, you just undo the four bolts holding the top mount to the chassis and drop the whole thing out. Then it’s easy enough to get spring compressors on the strut and break it all down into component pieces.
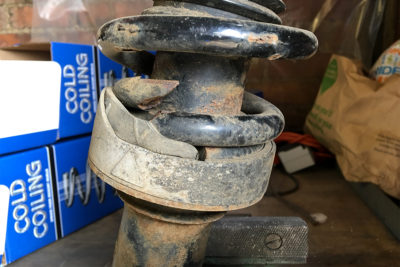
Everything went smoothly enough. Undoing the strut top bolts was a mother of a job but, with a mishmash of extensions and breaker bars, they all eventually came undone. Taking it apart was easy (another win for air tools), but of course my doubts about the eBay springs were well founded: completely the wrong size and shape. They’ve got to go back and the dubious seller is being pretty tight about paying for the return, even though they sent the wrong parts. I had a strong feeling that it was all too good to be true.

There are very few affordable options for uprated damper & spring kits on Cayennes, so to give myself more time to research what is out there and get the car back on the road in the meantime, I ordered a low mileage used rear strut assembly from a breaker friend of mine and will put that on to get the Cayenne through the MOT.
While I have the thing up in the air, I pulled the rear bumper, relocated the LPG filling point on to the chassis, jet washed everything and sprayed it all with some rustproofing wax.
by John Glynn | Jun 14, 2016 | Porsche Cayenne, Project Cars
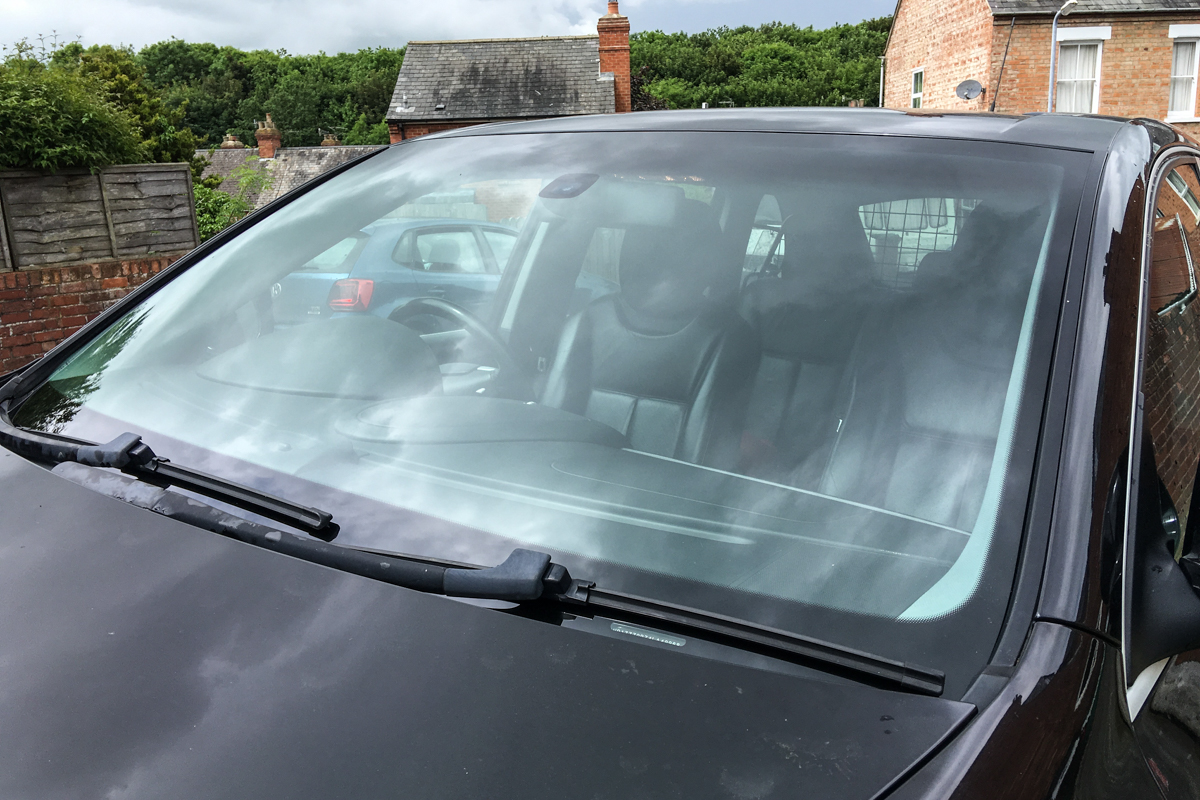
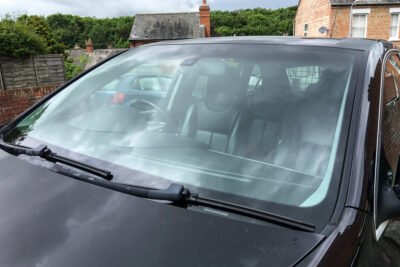
After 158,000 miles of chips and scratches and a recent heavy impact with a hefty crow, today it was time for my Porsche Cayenne to enjoy a windscreen replacement. My insurers have an agreement with Autoglass, so I set up an appointment and waited for the fitter to arrive.
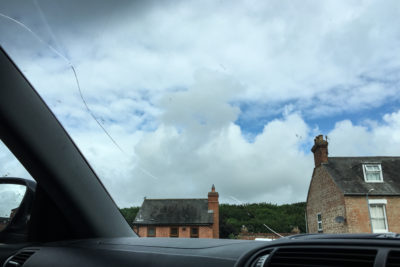
The crow incident had cracked the screen from top to bottom, so it needed replacing. Having used some of the big windscreen removal companies a few times, and seen how their rush job fitters can make a bit of a hash of things, in the past I have bought the glass and bonding adhesive to do my own cars. However, this was a big bit of glass so not an easy one-man job, and the top tint and auto wiper sensor made the screen pretty expensive. Better to let the professionals do it, with a little bit of help to lift the glass in.
The Autoglass guy came early and took a bit of time deciding where best to carry out the work. Rain was on the way and he needed to line his van up perpendicular to the Porsche, to be able to use the side-mounted awning if needed. There was no space on the street to do this, so he decided to park the car just inside the gates on my soon-to-be-driveway, with the nose sticking out of the gates. We took a bit of time to get the Cayenne level and it all worked out OK.
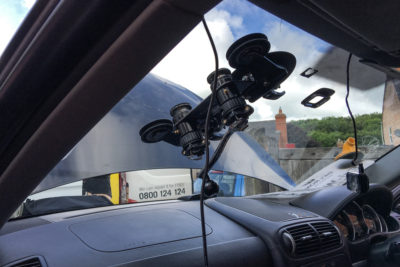
Ezi-Wire patented windscreen seal cutting tool
My last windscreen change was done by a local guy who cut the screen out of my Spec B Subaru Legacy estate using hand-held knife blades. He had to strip half the interior trim to do the job properly. The Cayenne’s windscreen replacement was made easier by the use of an ‘Ezi-Wire’ device mounted to the inside of the screen (above), which gently pulled a high tensile steel cable through the windscreen adhesive and made a very tidy job of it. Apparently the Ezi-Wire is an Autoglass/Carglass/Belron patented tool, so no wonder I hadn’t seen it before.
The Ezi-Wire uses a pair of winding spools, controlled by a hand ratchet. The twin spools cut from opposite directions and allow controlled “slip cutting”, which enables the cable to slice through the bonding seal rather than the seal having to be cut with a hard-to-control hand knife, so the work is much less risky. The Autoglass technician had a van full of tools, but reckoned the Ezi-Wire helped him do most jobs right first time, with no damage to the vehicle.
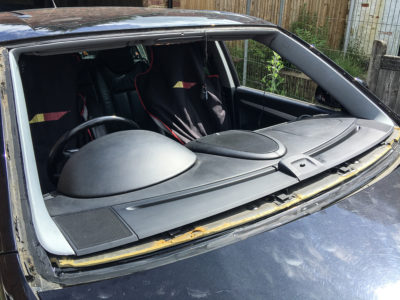
From start to finish, the whole thing took two hours including two cups of tea and plenty of chat. I am delighted with the finished product: you can’t beat a new windscreen to lift the driving experience. Also delighted that I had Dick’s thirty years of glass fitting experience here to do the work. I did find a small bit of surface rust in the top right corner of the Cayenne’s windscreen aperture, but I cleaned it up and ground the rust out before adding a bit of Kurust treatment. It was then finished with an anti-rust primer before the windscreen was fitted.

by John Glynn | Apr 13, 2016 | Project Cars, Porsche Cayenne
My much-loved 2004 Porsche Cayenne S (4.5 V8) behaved itself for most of this winter just gone, apart from a couple of minor hiccups. The first required a battery change, but the other was a little more challenging.
I should have seen it coming when the Cayenne would very occasionally take a few of seconds of cranking to get started when hot. I assumed it was some sort of fuel boil-off to do with the LPG system, but then it was a random occurrence and perhaps also happened when running on petrol.
Porsche Cayenne Poor Running
A few weeks ago, I filled up with LPG and was just driving away when I was forced to do an emergency stop. The hard braking caused the Cayenne to cut out and it was a bit of a pig to get started again. Eventually it did start, but would not pull away from junctions cleanly once I got it going. I thought it might be something to do with the emergency braking system (an Audi I once drove had something like this) so I pulled over, reset the systems and drove off, apparently cured.
The next day, the problem was back, with poor acceleration on the school run. I emailed Chris at JZM and asked what he thought. There were a few suggestions, but he could stick it on their Porsche PIWIS the following day to be sure. Next morning, I dropped the kids to school and headed for Kings Langley, where we plugged it in and read the fault codes.
There were a few things on there (as usual for any Cayenne), but one I had been looking for: crankshaft position sensor fault. The ECU said it had last happened at 41k miles, but first happened at 63k miles even though the car was now on 157k miles. I couldn’t see anything else. Mike had a good look through everything – bit of a pain as the Cayenne takes ages to give up its codes and the PIWIS diagnostic walk-throughs only work on post-2006 cars – before deciding to do a master reset, run it again, then read the codes and see what was showing.
Cayenne Crankshaft Position Sensor Failure
Having done the reset, the Cayenne wouldn’t start. It would crank and crank but no start. Complete failure in the best possible place: a decent independent Porsche workshop! We left it a while and then like magic it started fine. As the last major fault code had been for crankshaft position sensor, we agreed this was the first thing to change. I borrowed a courtesy car and Mike changed the sensor the following day, which seemed to cure the problem.
Thoughts since the change? Wow, what a difference. Things the Cayenne used to do which mildly annoyed me have all disappeared. It starts first time, every time, and pulls cleanly from anywhere in the rev range: easily the smoothest it has been in my 40k miles of ownership. Still needs flicking down a gear when you really want to get moving, but a huge improvement overall.
If you’ve got a 955 Cayenne with 100k miles or more and it’s on the original CPS, get it changed and bring your Cayenne back to full health, before it leaves you stranded. Will be a bit of a nightmare job, as the plug is in quite a tight spot behind the top of the engine, but “it’s not that bad” according to Mike. One tip on where to get the part: as official Bosch agents, JZM bought my crank position sensor straight from Bosch and saved me quite a few quid. Good work!
PS: I collected the Cayenne and brought it home. That night, this happened (above). I was not pleased! Three other cars around it were also keyed so it wasn’t an anti-Porsche thing. My Polo was parked in front of it and that was not keyed, so it wasn’t an anti-me thing either. Such is life.
To read more of my work, commission my valuation expertise or hire my content generation skills, you can:

by John Glynn | Apr 12, 2016 | Classic Porsche Blog, Project Cars
My 1980 Porsche 924 Turbo restoration has made great progress since I reset my work schedule and committed to spending the weekends working on my own projects rather than sitting behind a laptop. My bank account is slightly less happy about the restoration, but payback will come in due course.
I’ve now clocked up a couple of hundred hours on this car, and poked around most of it. While there is unsurprising evidence of parking dents and other traumas from its former life in Italy, underneath all that it’s a really great example, especially now I have reconditioned most of the moving parts fixed to the bodywork. Dropping all the mechanicals to do a full restoration is very tempting, but I must resist.

Retaining Porsche Patina in Detailed Restoration
Perhaps the most engaging part of the rebuild after the 924 Turbo’s bodywork was so nicely stripped, prepared and repainted by my old friend Rob Campbell at Racing Restorations has been deciding what to keep and what to ditch, in hope of retaining some patina and original character to compliment the delightful new paint.
For example, none of the locks matched, so I junked all of them, pulled the smoothest ignition barrel out of my stash of 924 & 944 parts and then bought a full set of VW tumblers and rebuilt and rekeyed every lock on the car to match. This led to stripping the latch mechanisms and locks, new door seals, new hatch seals – you know how it goes.
The dash was a mass of old alarm wiring and leftover radio installations so all that got junked. The black speedo trim ring was rusty for whatever reason, so I tossed that and stripped another speedo to find one in better condition. That led to stripping all the clocks and cleaning the dials and glass faces so they all look great now.

Porsche 924 Turbo Strip & Rebuild
Everywhere I look on the 924 Turbo now, I see bit that have been stripped and rebuilt. I stripped the electric window regulators including the motors and sorted all those out, bench testing them before refitting to the car. I haven’t done anything about the wiper motors yet but I bet it happens. Having all of the trim out of the inside meant I could clean it up properly and Dynamat quite a bit, so the doors now shut with that satisfying clunk and none of the rattles that used to soundtrack entry and exit.
Having junked so much stuff, I also found a few bits I wanted to keep. The Italian plates are back on the car, just because I love them. I riveted the rear plate together, which is not strictly correct but it means bits of it can’t get stolen! I tossed the LED-infested centre console gauge surround and bought another mint one in black, but kept the slightly crappy cigarette lighter from my old one, as a well-used cigarette lighter in an 1980s Porsche is just so Italian, darling.

I fitted a replacement glass hatch with a good condition spoiler (the original was utterly ruined) and polished all the original glass, refitting it in a mix of new and good used seals. I liked the Italian anti-theft alarm window sticker so I kept that. Under the driver’s seat carpet, I found a 200 Lira coin from 1978, so that is now the keyring. I kept the original dog-leg gearlever but replaced the shift boot and sent the ratty steering wheel off to be restitched – I hope they can retain the original leather. I have a nice three-spoke for the car if not. I ordered a full gear linkage rebuild kit from AutoAtlanta in the US, but that has not yet arrived.

I fitted new rear speakers (long story) and decided not to cut the original front door panels to fit another pair of speakers – the rather spartan black vinyl has survived this long without cutting and deserves to be left alone. I stuck a centre speaker back in the dash to add some noise up front. I decided not to change the cracked dash: you can get new ones but 924 owners are generally well used to cracked dashboards. The original rear view mirror is a non-dipping version and I’m slightly on the fence about keeping or saving. I have a pair of dipping ones with the glass mounts in my stash so I may change that.

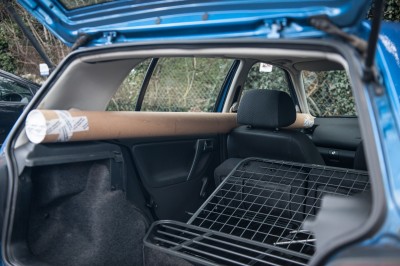
Original seat belts are in good condition so still in place: they were likely never used in Sardinia! The car is quite low mileage anyway, so they are fine. Refitted the original roof aerial as, while it is not the shiniest thing ever, it is perfect for the 924. I fitted a new rubber trim to the rear bumper (just squeezed into the Polo in the massive tube it ships in from Porsche) and new seals on the door mirror, door handles and boot lock.
I rebuilt the front bumper light clusters: you’d be surprised how long that took. One indicator reflector was completely rusted out so I stripped the reflector off another one and plastic welded it back together (the fun of playing with £5 parts). I cleaned and refitted the Italian side repeaters as, while they are not very attractive, they are original to the car. Stripped the window switches, sorted them out. All very satisfying. I have been keeping things as tidy as possible, but you’ll see from the photos that it needs a lot of cleaning when it is eventually back together: I am quite looking forward to that.

Classic Porsche Build Quality in spades
So many hours later, with many more left to invest, I continue to have great respect for classic Porsche build quality with the 924. The way it’s built is inspiring to work on when you’re not in a rush; so much intricate detail signposts the hours of highly skilled labour it must have taken to build each one. The assembly is very like my old E28 BMWs and Mk 2 Golf GTis: plated screws and high quality metal clips everywhere. It is time consuming to make things better – stripping the fusebox and wiring out to clean up the corroded earth points behind for example – but once done, you get the feeling it will last forever.
I feel sure I will buy another 924 to work on once this one is sold and I have cleared out a few more cars. The Signal Green 1977 924 we saw at Essen a few years ago is still very strong in my memory – that’s the sort of old-school 924 I would like to do some miles in if Turbo prices have soared out of reach. Small but modern 1.4 engine transplant, little Turbo, careful gearbox build, classic trim.


